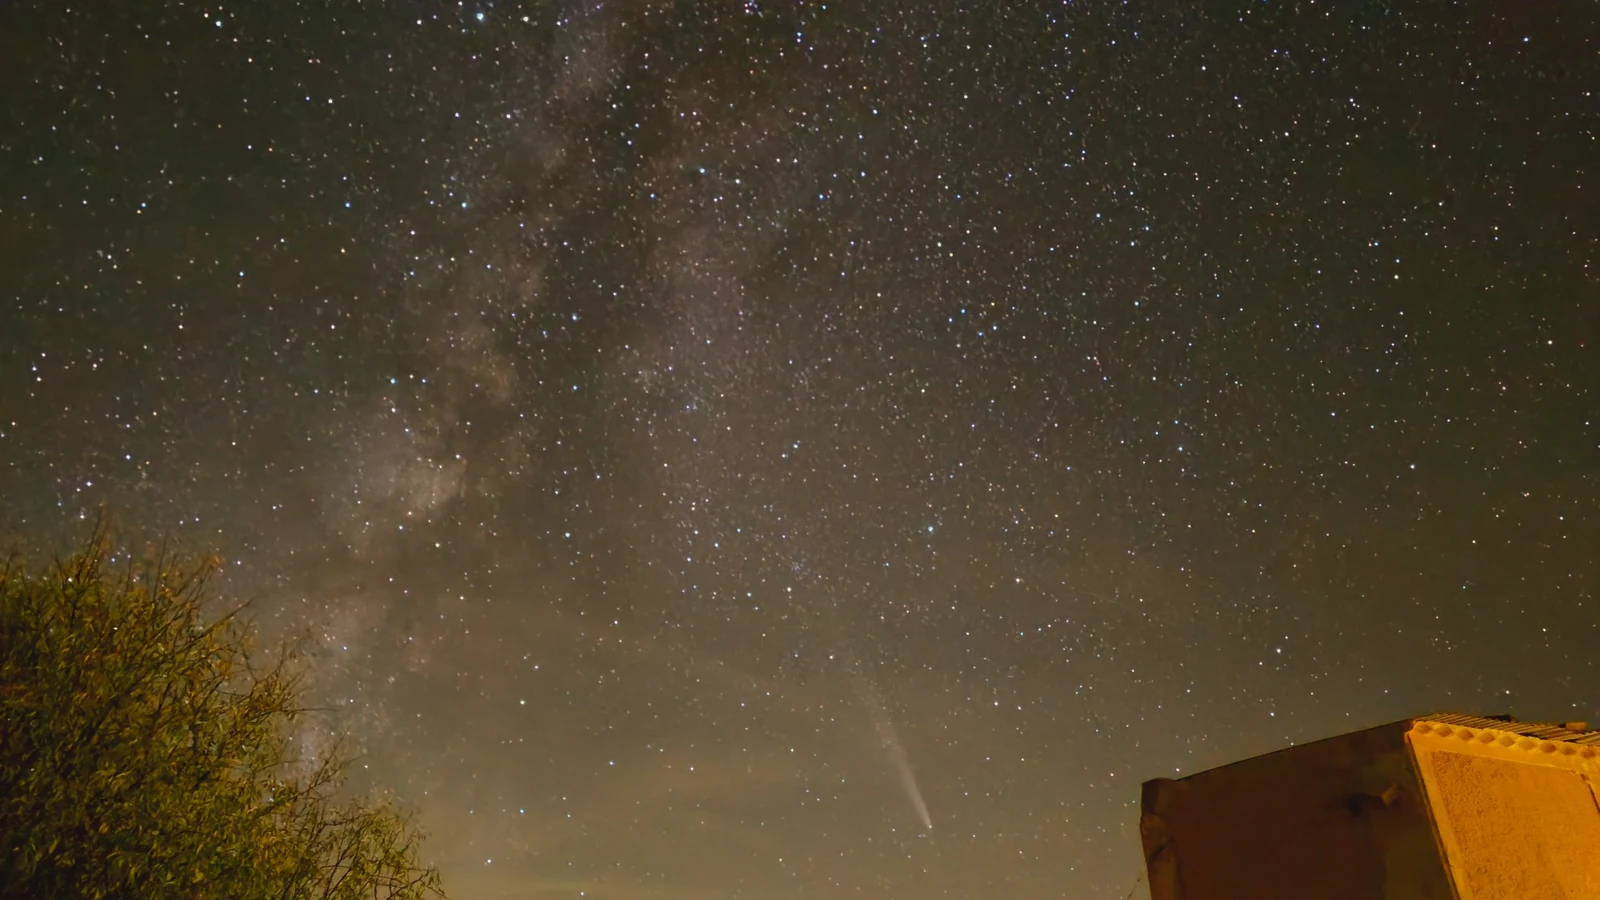
Photographed at Leonard’s Lookout using a Samsung Galaxy S23. No telescope, tracking mount or dedicated astronomy camera was used.
Updated June 2026
The Bortle scale for astrophotography is useful, but it is frequently misunderstood. It divides night skies into nine classes, from Class 1 under exceptionally dark natural conditions to Class 9 beneath a brightly illuminated inner-city sky.
The scale was developed by experienced observer John E. Bortle and published in Sky & Telescope in 2001. Its classifications are based primarily on visual indicators such as the appearance of the Milky Way, zodiacal light, artificial light domes, clouds, naked-eye limiting magnitude and the visibility of objects including the Triangulum Galaxy, M33.
It was not designed as an exposure calculator. A Bortle class does not prescribe integration times, individual sub-exposure lengths, camera settings or the faintest object that a particular imaging system can record.
This guide explains:
- what each of the nine Bortle classes means;
- how increasing sky brightness affects astrophotography;
- which types of target are most affected;
- why broadband and narrowband imaging respond differently;
- what a Bortle rating cannot tell you;
- and how to assess a site more reliably.
What the Bortle scale for astrophotography actually tells you
A Bortle class is a qualitative assessment of the appearance and darkness of the night sky.
It is not a direct physical measurement, and it is not determined by entering a sky-brightness reading into an official conversion table.
The original scale uses several visual indicators because naked-eye limiting magnitude varies with the observer’s eyesight, experience, dark adaptation and the effort spent looking for faint stars. Bortle also noted that relatively modest light pollution affects diffuse objects such as nebulae, galaxies and comets more severely than it affects stars.
Modern research into night-sky brightness measurement and assessment distinguishes between visual classification and instrumental measurement. The night sky includes both natural sources of background light and artificial skyglow, and its measured brightness depends on the equipment, spectral response, direction and observing conditions.
A location should therefore not be treated as having one immutable Bortle number under every possible condition. Its apparent sky quality can change with:
- atmospheric transparency;
- aerosols, dust and humidity;
- cloud cover;
- the Moon;
- airglow;
- the direction being observed;
- seasonal changes in the Milky Way and zodiacal light;
- nearby temporary lighting;
- and changes in artificial lighting over time.
For a meaningful visual assessment, the sky should be observed after astronomical twilight on a clear, moonless night, once the observer is properly dark adapted. That is why photographers planning a dedicated imaging trip should look beyond a single Bortle number; Leonard’s Lookout offers astrophotography accommodation in Spain with Bortle 3 skies, outdoor setup areas and power access.
The Bortle scale is not an SQM conversion table
Night-sky brightness is often measured in magnitudes per square arcsecond, commonly abbreviated to mag/arcsec² or mpsas.
A Sky Quality Meter measures brightness within the field of view and spectral response of that particular instrument. A higher mpsas reading represents a darker measured sky.
The original Bortle scale did not assign fixed mpsas boundaries to its nine classes. Tables that place precise SQM ranges beside each Bortle class are later approximations, not part of Bortle’s original system.
A zenith SQM reading and a Bortle classification also describe different aspects of the sky:
- an SQM reading measures brightness within a restricted area;
- a visual Bortle assessment considers phenomena across a wider part of the sky;
- a zenith measurement may miss artificial light domes near the horizon;
- different instruments have different spectral responses;
- and natural sources such as airglow, zodiacal light and the Milky Way can affect the recorded brightness.
For serious site assessment, visual observations and repeated instrumental readings should complement one another rather than being treated as interchangeable.
How a brighter sky affects an astronomical image
An astronomical camera records photons from the target together with photons from the sky background.
Background gradients and colour casts can often be modelled and reduced during processing. The photon noise associated with the recorded sky background cannot simply be removed, however.
A brighter sky therefore makes faint astronomical signal harder to separate from the noise contributed by the background.
The effect is particularly important for faint extended targets because their light is spread across many pixels and may be only slightly brighter than the surrounding sky.
Under sky-background-dominated conditions:
- a brighter background contributes more photon noise;
- additional total exposure improves the signal-to-noise ratio;
- and signal-to-noise generally improves with the square root of total exposure time.
This does not create a universal exposure multiplier for each Bortle class. The result depends on the actual measured sky brightness, optical speed, aperture, focal length, image scale, camera efficiency, gain, read noise, filter transmission, target spectrum and target altitude.
A Bortle number alone cannot determine how long an individual sub-exposure should be.
Bortle Classes 1–9: quick comparison
The following table summarises the Bortle scale for astrophotography, while keeping Bortle’s original visual descriptions separate from their practical imaging implications.
| Class | Original visual category | Original naked-eye limiting magnitude | General astrophotography implication |
|---|---|---|---|
| 1 | Excellent dark-sky site | 7.6–8.0 with effort | Exceptional conditions for very faint broadband structures and natural night-sky imaging |
| 2 | Typical truly dark site | 7.1–7.5 | Excellent for faint broadband targets, Milky Way work and deep integrations |
| 3 | Rural sky | 6.6–7.0 | Very strong conditions for broadband, narrowband and Milky Way imaging |
| 4 | Rural/suburban transition | 6.1–6.5 | Productive for most targets, with more gradients and background noise |
| 5 | Suburban sky | 5.6–6.0 | Workable, although faint broadband subjects become increasingly demanding |
| 6 | Bright suburban sky | About 5.5 | Emission-line and brighter targets become more efficient than faint broadband work |
| 7 | Suburban/urban transition | About 5.0 | Strong skyglow; faint broadband subjects require substantial effort |
| 8 | City sky | About 4.5 at best | Emission-line, compact and high-surface-brightness targets are more practical |
| 9 | Inner-city sky | 4.0 or less | Severe background and local-light constraints, although selected imaging remains possible |
The limiting magnitudes and category names come from John Bortle’s original scale. The astrophotography implications are practical interpretations based on the behaviour of astronomical signal and sky-background noise. They are not part of Bortle’s original definitions.
Class 1: Excellent dark-sky site
What the sky looks like
In Bortle’s original Class 1 description, zodiacal light, the gegenschein and the zodiacal band are all visible. M33 can be seen directly by a suitably adapted observer, and the brightest areas of the Milky Way may cast diffuse shadows.
Natural airglow can be apparent, while equipment, vehicles and people may be extremely difficult to distinguish unless silhouetted against the sky.
What it means for astrophotography
Class 1 represents an exceptionally low artificial sky background.
It is particularly valuable for targets whose surface brightness is extremely low, including:
- integrated flux nebulae;
- galactic cirrus;
- very faint outer regions of galaxies;
- dark nebulae;
- reflection nebulae;
- faint dust structures;
- and extremely deep wide-field mosaics.
The low artificial background allows weak broadband signal to separate from the recorded sky more efficiently than it would beneath a brighter sky.
A Class 1 sky is not perfectly black or uniform. Airglow, zodiacal light, diffuse Galactic light and the Milky Way itself remain genuine natural sources of background illumination. They can create structure and gradients in sufficiently deep images.
The darkest Bortle class therefore does not eliminate calibration or gradient modelling. It minimises artificial skyglow; it does not remove the natural night sky.
Class 2: Typical truly dark site
What the sky looks like
Under Bortle’s Class 2 description, M33 remains relatively easy to see directly, the summer Milky Way is highly structured and zodiacal light is prominent.
Clouds generally appear as dark gaps against the stellar background rather than as illuminated objects. The surrounding landscape remains difficult to distinguish clearly without artificial light.
What it means for astrophotography
Class 2 conditions remain excellent for almost every form of optical deep-sky astrophotography.
They are especially beneficial for:
- broadband galaxies;
- reflection nebulae;
- dark nebulae;
- faint Galactic dust;
- Milky Way mosaics;
- comet imaging;
- and deep natural-colour integrations.
The practical difference between Classes 1 and 2 cannot be represented by one predictable change in exposure time. Transparency, airglow, target altitude and the brightness in the target’s direction can be as important as the nominal class boundary.
Class 2 remains a genuinely dark sky and should not be regarded as significantly deficient for normal amateur astrophotography.
Class 3: Rural sky
What the sky looks like
Some artificial light becomes evident near the horizon. The Milky Way still shows complex structure, M33 can be seen with averted vision and zodiacal light remains conspicuous at favourable times of year.
Clouds may appear faintly illuminated near the brightest parts of the horizon while remaining dark overhead.
What it means for astrophotography
Class 3 is a highly capable astrophotography environment.
Broadband imaging of galaxies, reflection nebulae, dark nebulae and faint Galactic dust remains practical. Emission nebulae can be photographed in broadband colour or through narrowband filters.
Compared with Classes 1 and 2, the main compromises are likely to be:
- artificial gradients toward populated horizons;
- greater dependence on target direction;
- some loss of efficiency on the faintest broadband structures;
- and more processing effort for very deep integrations.
Targets positioned high above the horizon and away from visible light domes may be recorded beneath a substantially darker local background than objects positioned toward a source of artificial skyglow.
For many amateur imaging systems, Class 3 provides strong conditions for deep-sky, Milky Way and narrowband work without requiring the extreme remoteness often associated with Classes 1 and 2.
Class 4: Rural/suburban transition
What the sky looks like
Artificial light domes are evident above population centres in several directions. The Milky Way remains impressive when high in the sky but has lost much of its finer naked-eye structure.
M33 becomes a difficult averted-vision object. Clouds are slightly illuminated toward sources of light pollution while remaining dark overhead.
What it means for astrophotography
Class 4 remains suitable for a wide range of deep-sky work.
Bright and moderately faint galaxies, star clusters, planetary nebulae and emission nebulae can all be photographed effectively. Milky Way images remain possible, particularly when the Galactic plane is high and the camera is directed away from major light domes.
The limitations become more apparent when attempting:
- faint reflection nebulae;
- dark nebulae;
- low-surface-brightness galaxy extensions;
- Galactic cirrus;
- and natural-colour images close to illuminated horizons.
These subjects remain possible, but the increasing background normally requires more integration and more careful gradient control than a darker rural sky.
A site may also show sky characteristics closer to Class 3 overhead while appearing nearer Class 4 toward particular horizons. A single class cannot describe every direction equally well.
Class 5: Suburban sky
What the sky looks like
The Milky Way appears weak or washed out overhead and may disappear near the horizon. Artificial light sources are apparent in most directions, while clouds commonly appear brighter than the clear sky behind them.
Only traces of zodiacal light may be visible under favourable seasonal conditions.
What it means for astrophotography
Class 5 does not prevent serious astrophotography, but target selection becomes increasingly important.
Strong candidates include:
- brighter galaxies;
- open and globular clusters;
- planetary nebulae;
- bright reflection nebulae;
- and emission nebulae, particularly when suitable filters are used.
Faint broadband subjects become less efficient because their weak surface brightness competes directly with the elevated sky background.
Milky Way photography remains possible in favourable conditions, but contrast between Galactic structure and the surrounding sky is reduced. Images taken toward an artificial light dome are likely to contain stronger colour and brightness gradients.
Processing can correct uneven illumination and colour casts. It cannot recover signal-to-noise that was never recorded.
Class 6: Bright suburban sky
What the sky looks like
Zodiacal light is no longer visible. Any visible Milky Way is largely confined to its brighter regions near the zenith.
The lower sky has a conspicuous pale glow, clouds appear bright and M31 is only moderately apparent to the unaided eye.
What it means for astrophotography
At Class 6, the artificial background becomes a major constraint for faint broadband imaging.
Useful targets still include:
- emission nebulae;
- planetary nebulae;
- star clusters;
- brighter galaxies;
- the brighter parts of supernova remnants;
- the Moon;
- and the planets.
Narrowband imaging of emission-line objects is generally more resistant to artificial skyglow because the filter admits a restricted wavelength region rather than a broad section of the visible spectrum.
That does not make narrowband imaging immune to background light. Results still depend on:
- filter bandwidth;
- the emission wavelength of the target;
- the spectrum of local lighting;
- moonlight;
- camera response;
- optical speed;
- and target altitude.
Broadband galaxy imaging remains possible, but faint outer structures and natural background colour require considerably more effort than they would beneath a rural sky.
Class 7: Suburban/urban transition
What the sky looks like
The overall sky has a pale grey appearance. Strong artificial-light sources are evident in several directions, the Milky Way is almost or completely invisible and clouds are strongly illuminated.
Only the brighter deep-sky objects remain visually conspicuous through ordinary amateur telescopes.
What it means for astrophotography
Astrophotography remains possible, but the difference between target types becomes pronounced.
More practical subjects include:
- emission nebulae through narrowband filters;
- compact planetary nebulae;
- bright open and globular clusters;
- the Moon;
- the planets;
- and selected high-surface-brightness galaxies.
More demanding subjects include:
- faint galaxies;
- reflection nebulae;
- dark nebulae;
- Galactic cirrus;
- faint broadband supernova-remnant structure;
- and natural-looking Milky Way landscapes.
Broadband images will normally contain a strong sky background and may show complex gradients from several lighting directions.
Longer total integration can improve random noise, but it does not make poor transparency, local glare or changing gradients irrelevant. Collecting more frames beneath a bright sky is not fully equivalent to collecting the same target data beneath a darker sky.
Class 8: City sky
What the sky looks like
The sky appears brightly grey, white or orange. Some stars belonging to familiar constellations are difficult to see or absent, and only the brighter Messier objects remain detectable through modest telescopes.
Artificial illumination is strong enough for the surrounding environment to remain clearly visible.
What it means for astrophotography
Class 8 is a severe environment for faint broadband deep-sky imaging, but it does not make all astrophotography impossible.
Viable work can include:
- narrowband emission-nebula imaging;
- bright planetary nebulae;
- double stars;
- bright star clusters;
- lunar imaging;
- planetary imaging;
- solar imaging with suitable solar equipment;
- and selected compact deep-sky targets.
Faint extended broadband objects are difficult because their surface brightness is small compared with the urban background.
Local lighting can also create problems not adequately represented by a Bortle classification, including:
- internal reflections;
- flare;
- reduced contrast;
- uneven gradients;
- and direct illumination of the equipment.
Shielding a telescope or camera from nearby lamps may reduce direct glare, but it cannot remove artificial skyglow already scattered through the atmosphere.
Class 9: Inner-city sky
What the sky looks like
The sky remains brightly illuminated even at the zenith. Many familiar constellation stars are absent, and dim constellations may disappear entirely.
The Moon, planets and a small number of bright clusters dominate visual observing.
What it means for astrophotography
Class 9 represents the most difficult artificial sky background within the Bortle system.
It does not mean that a camera records nothing. It means that the range of efficient targets and techniques is substantially narrower.
The most practical choices generally include:
- the Moon;
- the planets;
- the Sun using suitable solar equipment;
- bright double stars;
- bright clusters;
- compact planetary nebulae;
- and strong emission-line nebulae through narrowband filters.
Faint broadband deep-sky imaging is heavily constrained by sky background, direct local light and complex gradients.
Successful urban images are possible, but they do not demonstrate that dark skies provide no advantage. Urban techniques can make selected targets accessible; they do not reproduce the broadband efficiency or natural sky background of a genuinely dark site.
Broadband and narrowband imaging across the Bortle scale
Understanding broadband and narrowband imaging is central to using the Bortle scale for astrophotography correctly.
Broadband imaging
Broadband imaging records a broad section of the visible spectrum.
It is normally used for subjects such as:
- galaxies;
- reflection nebulae;
- dark nebulae;
- star clusters;
- natural-colour Milky Way images;
- and many comet images.
Because both the astronomical target and artificial skyglow contribute photons across broad wavelength ranges, broadband imaging is particularly sensitive to increasing sky brightness.
This is why the benefit of darker skies is most obvious when imaging faint continuum sources and low-surface-brightness structures.
A light-pollution-reduction filter cannot universally recreate a dark sky. Any filter that rejects part of the spectrum may also reject some light from a broadband target. Its effectiveness depends on the relationship between the target spectrum, artificial-light spectrum and filter transmission curve.
Narrowband imaging
Narrowband imaging records restricted wavelength regions associated with particular emission lines, commonly including hydrogen-alpha, doubly ionised oxygen and singly ionised sulphur.
This can reject much of the light outside the transmitted bands and makes suitable emission nebulae more practical from suburban and urban locations.
Its limitations remain important:
- it is principally suited to emission-line targets;
- it does not turn galaxies or reflection nebulae into narrowband objects;
- wider filters admit more background than narrower filters under otherwise comparable conditions;
- moonlight and artificial lighting may still contribute inside or near the transmitted band;
- and camera, filter and optical-system characteristics still affect the result.
The correct conclusion is not that narrowband imaging makes Bortle class irrelevant. It reduces the influence of background light for suitable emission-line targets.
What about Milky Way photography?
The Bortle descriptions of the Milky Way refer to its visual appearance, not to a fixed photographic threshold.
A camera can record Galactic structure that is difficult or impossible to see unaided. However, as artificial sky brightness increases:
- contrast in the Milky Way decreases;
- horizon light domes become more prominent;
- colour correction becomes more difficult;
- faint dust lanes are harder to separate from the background;
- and the natural relationship between the sky and landscape is increasingly obscured.
Classes 1–3 provide the strongest natural conditions for detailed Milky Way and nightscape work.
Class 4 remains productive, particularly when shooting away from light domes.
Class 5 can produce usable results under favourable transparency and geometry, but the background is more intrusive.
From Classes 6–9, conventional wide-field Milky Way imaging becomes increasingly compromised, particularly near the horizon.
No Bortle class guarantees a successful Milky Way photograph. Season, latitude, target altitude, moonlight, atmospheric transparency, foreground lighting and camera technique remain critical.
Does Bortle class matter for lunar, planetary and solar imaging?
Only indirectly.
The Bortle scale describes the appearance and brightness of the night sky. It is most relevant to faint deep-sky and nightscape imaging.
For the Moon and bright planets, image quality is normally governed more strongly by:
- atmospheric seeing;
- target altitude;
- optical quality;
- focus;
- collimation;
- thermal stability;
- atmospheric dispersion;
- and capture technique.
Solar imaging takes place during daylight, so a night-sky Bortle classification is not a meaningful measure of solar-imaging quality.
A suitable solar filter must be installed correctly before a telescope, binocular or camera is directed at the Sun. The American Astronomical Society provides specific safety guidance for solar filters used with telescopes, binoculars and cameras.
A dark-sky location can still have poor atmospheric seeing, while an urban location can sometimes have sufficiently steady air for effective planetary imaging. Darkness and atmospheric steadiness are different properties.
Why a Bortle number cannot prescribe exposure settings
Claims such as “use a five-minute exposure in Bortle 3” or “halve the exposure in Bortle 6” are not technically defensible without specifying the imaging system and measured conditions.
Individual exposure length depends on:
- target brightness;
- optical focal ratio;
- aperture and focal length;
- pixel size and image scale;
- camera quantum efficiency;
- gain or ISO;
- read noise;
- dark current;
- full-well capacity;
- filter bandwidth and transmission;
- sky brightness in the target direction;
- target altitude;
- tracking accuracy;
- and the risk of saturation.
The Bortle scale can indicate the likely severity of the background. It cannot calculate an exposure sequence.
A more reliable method is to inspect actual subframes, measure the background and stellar values, avoid unwanted clipping or saturation, and collect enough total integration for the target, equipment and conditions.
How to assess your own sky properly
A defensible assessment of the Bortle scale for astrophotography should use more than a coloured light-pollution map.
DarkSky International’s night-sky survey guidance recommends using SQM measurements, Bortle interpretation and photographic evidence as complementary methods.
1. Make a visual Bortle assessment
Observe on a clear, moonless night after astronomical twilight.
Allow sufficient time for dark adaptation and assess several indicators rather than relying only on the faintest star you can see.
Record:
- Milky Way visibility and structure;
- zodiacal light where seasonally possible;
- visible artificial light domes;
- how clouds appear;
- the visibility of M31 and M33 when correctly positioned;
- and approximate naked-eye limiting magnitude.
2. Take repeated SQM readings
DarkSky International recommends taking at least six measurements per location during each visit and discarding the first reading.
Record the instrument model, location, time and conditions. Avoid measuring beneath direct lamps, tree cover or other obstructions.
Measurements should be made under a clear sky when the Moon is below the horizon and the Sun is at least 18 degrees below the horizon.
Remember that a zenith reading may not reveal a bright horizon.
3. Record photographic evidence
Use repeatable settings and retain the raw files.
Record:
- camera;
- lens;
- focal length;
- aperture;
- ISO or gain;
- exposure length;
- date and time;
- direction;
- and processing applied.
All-sky photographs are particularly useful for identifying light domes that a restricted zenith meter may miss.
4. Record the conditions
Include:
- Moon altitude and illumination;
- cloud cover;
- transparency;
- haze or dust;
- humidity;
- wind;
- seeing, where relevant;
- and temporary local lighting.
5. Repeat the assessment
One reading or observation describes one time and one set of conditions.
Repeated observations are needed to distinguish normal site behaviour from an unusually dark, bright, transparent, hazy or airglow-affected night.
Are online Bortle maps accurate?
Online light-pollution maps are useful planning tools, but they should not be treated as direct observations of the complete sky from an exact position.
Many maps use satellite observations of upward-directed or reflected artificial light combined with atmospheric modelling.
They may not fully represent:
- local shielding by terrain;
- nearby lamps;
- recent lighting changes;
- atmospheric conditions on a particular night;
- horizon light domes;
- natural airglow;
- or the spectral response of a particular camera or measuring device.
A mapped Bortle class should therefore be treated as an estimate to investigate, not as proof of the conditions experienced on the ground.
Is travelling to darker skies worthwhile?
For faint broadband astrophotography, usually yes.
A darker background improves the efficiency with which faint target signal can be separated from sky noise. The advantage is particularly important for:
- low-surface-brightness galaxies;
- faint outer galaxy structures;
- reflection nebulae;
- dark nebulae;
- integrated flux nebulae;
- Galactic cirrus;
- natural-colour Milky Way imaging;
- and wide-field nightscapes.
Travelling may provide less benefit for:
- lunar imaging;
- planetary imaging;
- solar imaging;
- bright double stars;
- and some narrowband emission-nebula projects.
The destination must also provide suitable weather, usable horizons, sufficient target altitude, safe access and an environment in which the equipment can operate reliably.
A low Bortle number is valuable, but it is only one part of a practical astrophotography site. If you are comparing locations for an imaging trip, our dark sky accommodation in Spain page explains the setup areas, power access, Starlink Wi-Fi and practical facilities available at Leonard’s Lookout.
Why Leonard’s Lookout is described as Bortle 3
Leonard’s Lookout is described as being beneath Bortle 3 skies rather than being assigned a class through a simple SQM conversion.
The Office for Sky Quality at the Instituto de Astrofísica de Andalucía conducted an extensive study of night-sky quality across the Granada Geopark.
The scientific work was undertaken between 2021 and 2023. It combined ground-based sky-brightness measurements with satellite data and photographs taken from the International Space Station to assess artificial light emissions and night-sky conditions across the Geopark.
When the Fuente Nueva area is plotted against the published V-band map, Leonard’s Lookout falls within the study’s darkest modelled category, at approximately 21.7–21.8 mag/arcsec².
That figure is a location-specific interpretation of the published map. It is not presented as an official instrument reading taken directly at the property. The evidence and methodology are explained on the Dark Sky Quality at Leonard’s Lookout page.
The wider Granada Geopark also completed the process of becoming a Starlight Tourist Destination in 2025 following documentary assessment and an on-site audit.
Using Bortle 3 is therefore a deliberately conservative practical description rather than a claim that every night and every direction will display identical conditions.
For astrophotographers, the important consequences are:
- a low artificial sky background;
- strong conditions for broadband deep-sky imaging;
- suitable skies for narrowband work;
- clear Milky Way potential;
- and the ability to undertake long imaging sequences away from major urban skyglow.
Leonard’s Lookout provides private astrophotography accommodation in Spain, with outdoor setup areas, power at the front and rear of the property, Starlink Wi-Fi and a dedicated office for target planning, monitoring and image processing.
Guests bring and operate their own cameras, mounts, telescopes, trackers and solar equipment.
For photographers who want to experience Bortle 3 skies rather than simply read about them, our astrophotography accommodation in Spain page explains the practical setup, facilities and observing conditions at Leonard’s Lookout.
Conclusion
Used correctly, the Bortle scale for astrophotography provides a useful starting point for understanding how sky brightness may affect different targets and imaging techniques.
Its limitations are equally important.
A Bortle rating is:
- qualitative rather than instrumental;
- dependent on conditions and observer judgement;
- not an exact SQM conversion;
- not necessarily uniform in every direction;
- and not an exposure calculator.
For astrophotographers, the general trend is clear: as the background becomes brighter, faint broadband signal becomes harder to record efficiently.
Classes 1–3 provide the strongest conditions for faint broadband targets and natural nightscapes. Classes 4–6 remain productive but require progressively more target selection, integration and gradient control. Classes 7–9 increasingly favour emission-line, compact and high-surface-brightness subjects, although capable imagers can still produce substantial results.
The Bortle number should begin an assessment, not end it.
Sources and further reading
- John E. Bortle — Introducing the Bortle Dark-Sky Scale, Sky & Telescope, February 2001
- John C. Barentine — Night sky brightness measurement, quality assessment and monitoring, Nature Astronomy
- DarkSky International — How to conduct a night sky quality survey
- European Southern Observatory — Signal, Noise and Detection
- Instituto de Astrofísica de Andalucía — Night-sky quality research across the Granada Geopark
- Fundación Starlight — Granada Geopark Starlight Tourist Destination certification
- American Astronomical Society — Solar filters for telescopes, binoculars and cameras
- Dark Sky Quality at Leonard’s Lookout